There are major pros and cons with each of them, and every plant species is more or less suited depending on the set of circumstances they evolved in, or were selected for. Where you live and your own local conditions will help you decide what is best where you are. Everywhere is different, and trial and error is key for maximum success.
Pots and or Buckets
They come in all sizes and shapes and I’ve tried a heap of different ones over the years.
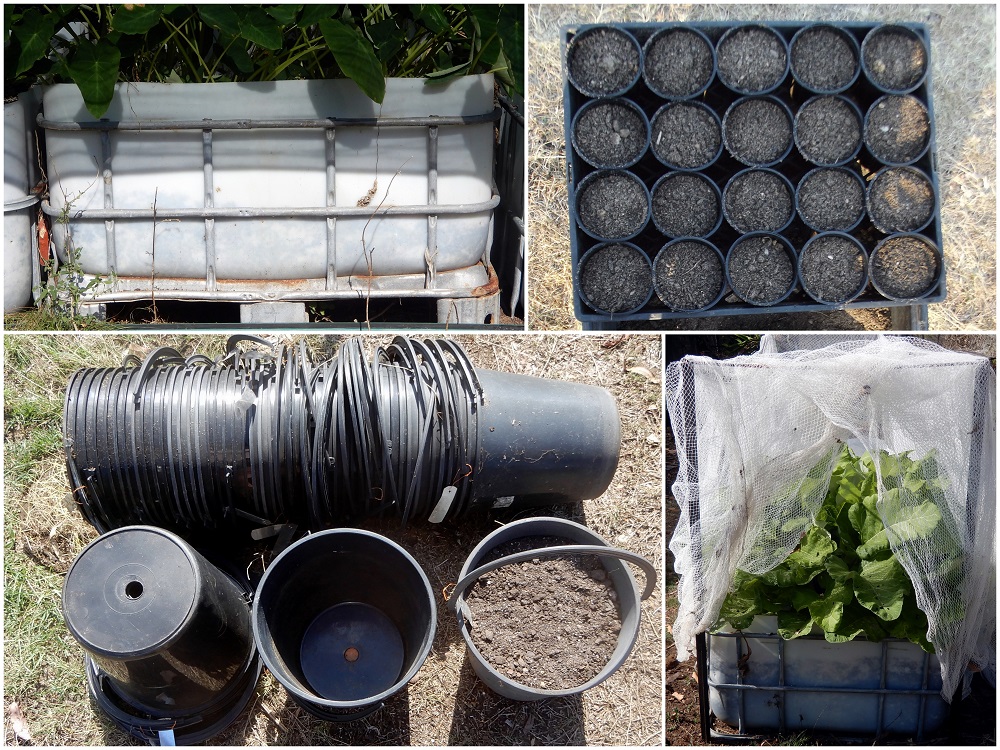
For us the 100mm round pots are great for starting seedlings as 20 fits in a standard tray, 5 trays is 100 plants and from that working out percentages can’t really get any easier!
The downside is shallow root space, poor ability to hold water due to the low volume, and having a smaller soil surface means much more variability in soil moisture and temperature. It also increases the chance of your seeds washing to the sides of the pot and out the bottom or just sinking too deep to germinate successfully. That said they are pretty ideal for starting many species provided you take these cons into account, and move the resulting seedlings out as soon as is practical.
Bigger pots do a better job, but they are more expensive and harder to store just due to the size.
Our workaround is to just use 9litre black plastic buckets instead!
Don’t bother with any other colour, that goes for pots too as they all degrade in sunlight way faster. In my experience red is worst followed by yellow and blue then green, but black lasts for years without dramas. Pouring lips and spouts mean weak points so skip those ones too. Back in the day when we first started using them, they were only ~17cents each, but these days they are around $1. Even that is super cheap when compared to a pot of the same size. Because they come with a handle moving them around is a breeze!
Bucket to pot conversion method
- To turn a bucket into a pot all I do is put a stack of 20 or so buckets upside down.
- I then get a place a piece of steel reo bar with a diameter of more than 1cm but less than 2cm.
- I stick it in the fire or BBQ till its red hot.
- I then carefully push it straight down through the stack of buckets in a single central hole. There will be a nipple looking join there already from when they were made so aim for that. Unlike drilling which removes material, this just softens and pushes the plastic to the sides of the hole reinforcing it just like a weld does in steel. It ends up looking a bit like a rivet, and this reinforced lip makes the pots last much longer without cracking.
The only thing to remember is straight after you push the steel through and remove it, then quickly separate all the buckets so they don’t stick together! I use these cheap 9litre black bucket pots for pretty much everything and they are great for germination of seeds. If they crack or split after many years of use(or the bloody wallabies smashing into them at night) just double them up and use two at once.
Tubs and tanks
Here where we are planting straight into the dirt worked great the first few years as that was when we were having major flooding pretty regularly. That level of rainfall plus our sandy mineral-rich soil meant awesome growth!
As we had moved down from the tropical north where rainfall like this was normal, we were totally unaware that this was exceptionally rare here…
Well, we were told repeatedly by locals and the news it was unusual, but when you have lived and worked around Tully and Cairns for years it’s kinda hard to imagine life without a reliable wet season…
When those wet seasons disappeared completely we persisted and pretty consistently failed for a long time until we started to focus more on the water-holding ability of tubs and tanks.
We made heaps of boxes and raised beds from sheets of tin, old coolroom doors or timber panels, old bathtubs, stock troughs, and half cut IBC tanks have all been given a good run for their money, and here where I am the 1000lt IBC tank wins by far.
I tried all sort of “wicking bed” type contraptions that have any empty part in the bottom to pool the water and none of them worked as well as what I do with them now. The small soil volume coupled with low water inputs meant that the evaporative loss of water was much too high for optimum plant growth. It also meant that salts built up in the surface of the soil over time making the soil hydrophobic. If I had more water or even better, some bloody rain, then this issue would be easily avoided by a regular deep watering flush.
But yeah, I unfortunately don’t…
1000lt IBC pod tank to garden bed conversion method
- I take a 1000lt IBC tank. Its metal cage is 5 squares high.
- I lay it on its side and cut it in half so you now have 2x 500lt tanks.
- I then remove all the sharp rough edged half pipes that have been cut in half and are sticking up dangerously.
Now you have 2x tanks, both with 2 neat rows of squares high. - Using a piece of red hot steel about 1cm diametre I put a drainage hole in each side NOT bottom of the tank in line with the top of the first row of squares. That means if I step back and look at them starting from the ground I see a row of square bars, then a drainage hole in the side, then as I move up higher I see another row of bars, then the now smooth cut top row of bars, then a space of half a square, then the smooth cut plastic liner.
- Fill the tanks with anice sandy soil mix and water well and plant as per normal.
This means each tank will fit about ~450lts of sandy soil if you leave a space at the top.
It will also easily hold ~100litres of water in the bottom soil layer all year round, and with the soil in direct contact with it, the evaporation rate and temperature is much slower and lower than if it were an empty water space like fancy wicking bed designs do.
In heavy rain or if overwatered it will still overflow and drain, but it will also always retain a lot of water as storage too.
For us here they work awesome!
When I have a few I wack a star picket in each corner of the row of tanks. I then tie a piece of wire around the top and hang a piece of bird netting or shade cloth on it like a curtain. This stops the cane toads and critters getting in as well as providing dappled light and a little shade.
It really is perfect for us here and it’s only when things are real grim that the kangaroos and wallabies push their way in regardless.
Rows crops.
When we came here I used to plant everything directly in the ground which worked fine when we had regular seasonal rains.
This doesn’t happen anymore, so its a consistent dismal failure, and/or it just feeds the local wildlife…
I only really use this method when I want to select for hardiness these days. If we ever get consistently predictable rain cycles again I will immediately switch back to rows as it works awesome, but only provided there is rain…
Without it, conditions here are too harsh for most common food crops to be successful without protection from the elements and the critters.
It does help me improve the hardiness of existing lines though and to do that all I do is grow a heap plants. I then plant them down the back in a large fenced-off area we have dubbed “The Exile”.
I then just walk away and come back later and see what lived.
Survivors that crop well are then crossed back to the main line to increase hardiness going forward. Because the soil is rocky rubble, there is no shade or water supplementation, all the poorest performing plants are culled out without any assistance thanks to Darwin.
This continuous selection process is how we adapt delicate species that really struggle, into hardy productive species well worth having in the collection!